How to navigate(UINavigationController) in SwiftUI?
Every iOS application developer should have familiarity with UINavigationController. The navigation controller from UIKit is used to
manage screens or UIViewController. UINavigationController uses a stack to manage the screens. We can push and pop screens out of it, we use many approaches for bringing a screen or a UIViewController to the front or switching or transitioning between screens or presenting it as a modal. For example segue in the StoryBoard.
NavigationView of SwiftUI
SwiftUI lets us navigate between screens or Views by using a struct called NavigationView. NavigationView conforms to the protocol View, And it does not have a body. Instead it can have content like VStack or HStack. To learn more about NavigationView let’s update our RestaurantMenu app and dive into the menu and look for more details. You can complete the steps in our previous post to create the menu app here in our previous post or Download the RestaurantMenu project here.
Menu Detail
Let’s create a menu detail screen, so that we can display details of a menu if a user clicks on a menu. Click on CMD + N shortcut to Create a new file and select SwiftUI View under User Interface section. And now copy the code below and paste it in MenuDetail struct. We will get into detail about this in our upcoming posts.
var dish: Dish
var body: some View {
VStack {
dish.image
.edgesIgnoringSafeArea(.top)
.frame(height: 300)
.scaledToFit()
.clipShape(Circle())
VStack(alignment: .leading) {
Text(dish.name)
.font(.title)
HStack(alignment: .top) {
Text(dish.cuisine)
.font(.subheadline)
.fontWeight(.bold)
Spacer()
Text("$\(dish.price)")
.font(.headline)
}
}
.padding()
Spacer()
}
.navigationBarTitle(Text(verbatim: dish.name), displayMode: .inline)
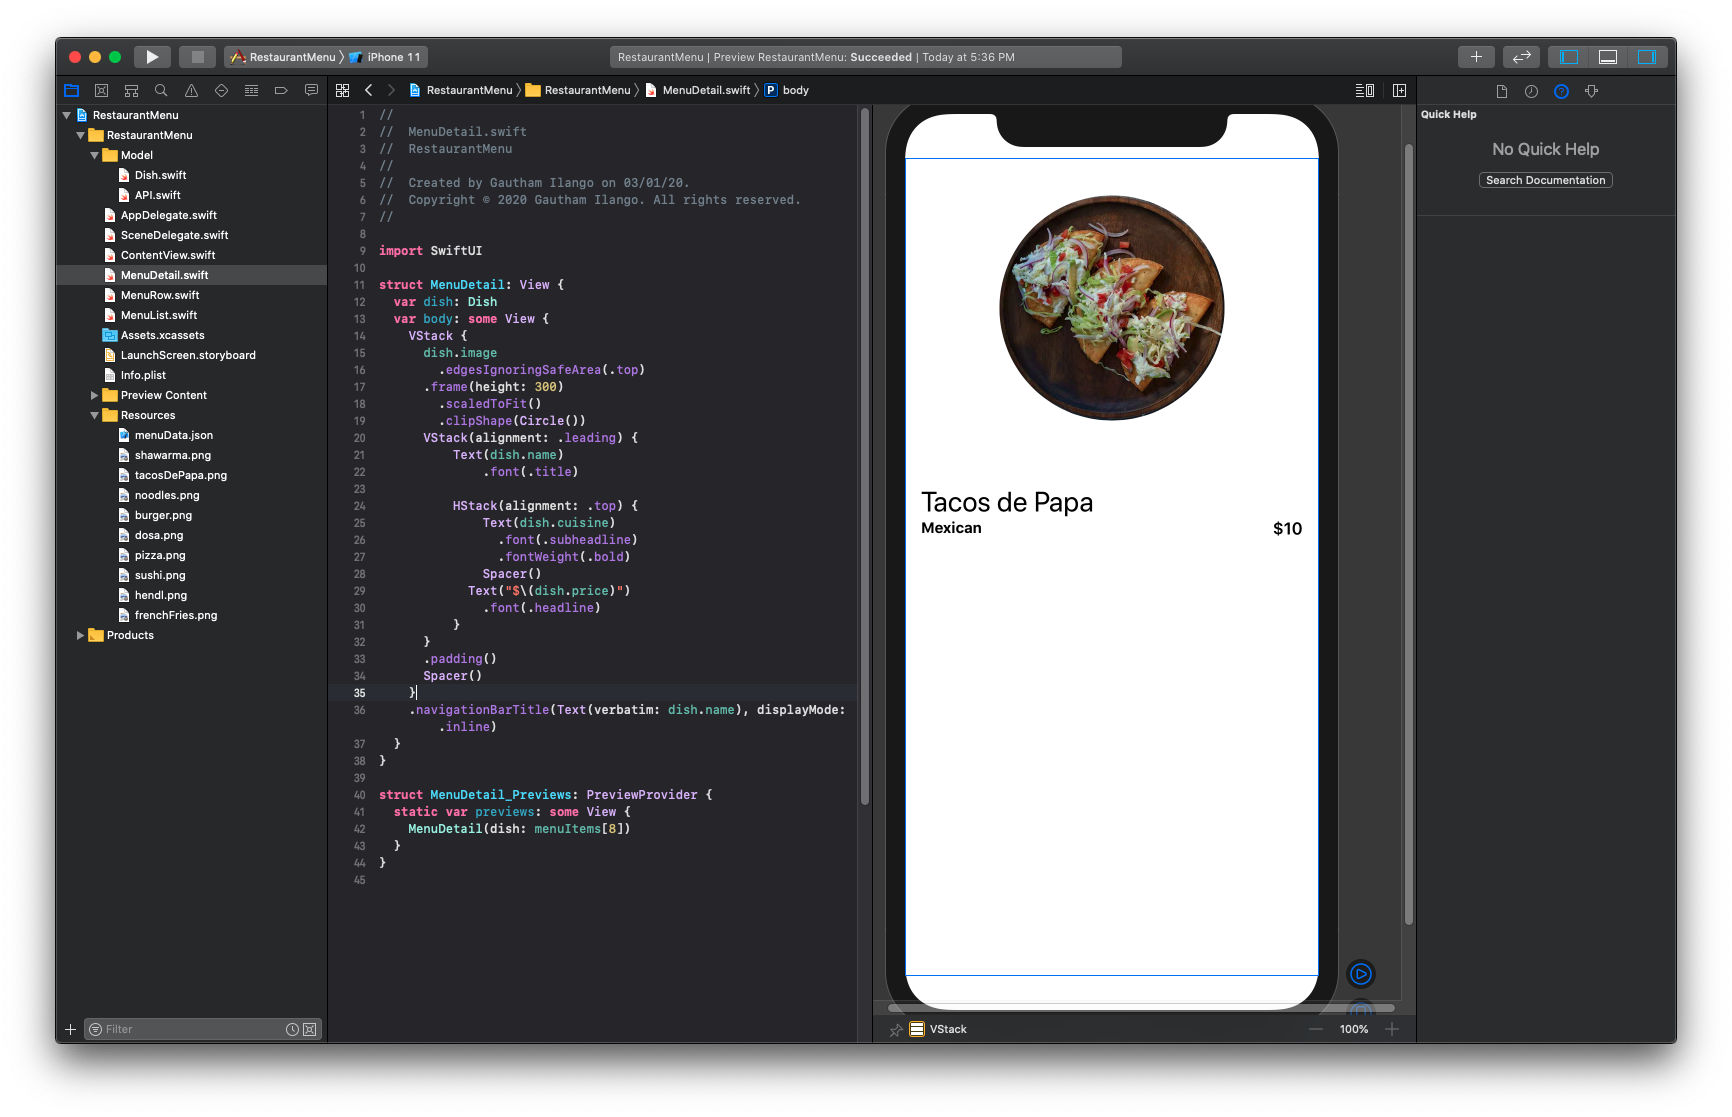
}After entering the code, the preview should look like this.
How to Navigate between screens in SwiftUI?
Copy the below code into the getter of var body in MenuList struct.
NavigationView {
List(menuItems) { dish in
NavigationLink(destination: MenuDetail(dish: dish)) {
MenuRow(dish: dish)
}
}.navigationBarTitle(Text("Menu"))
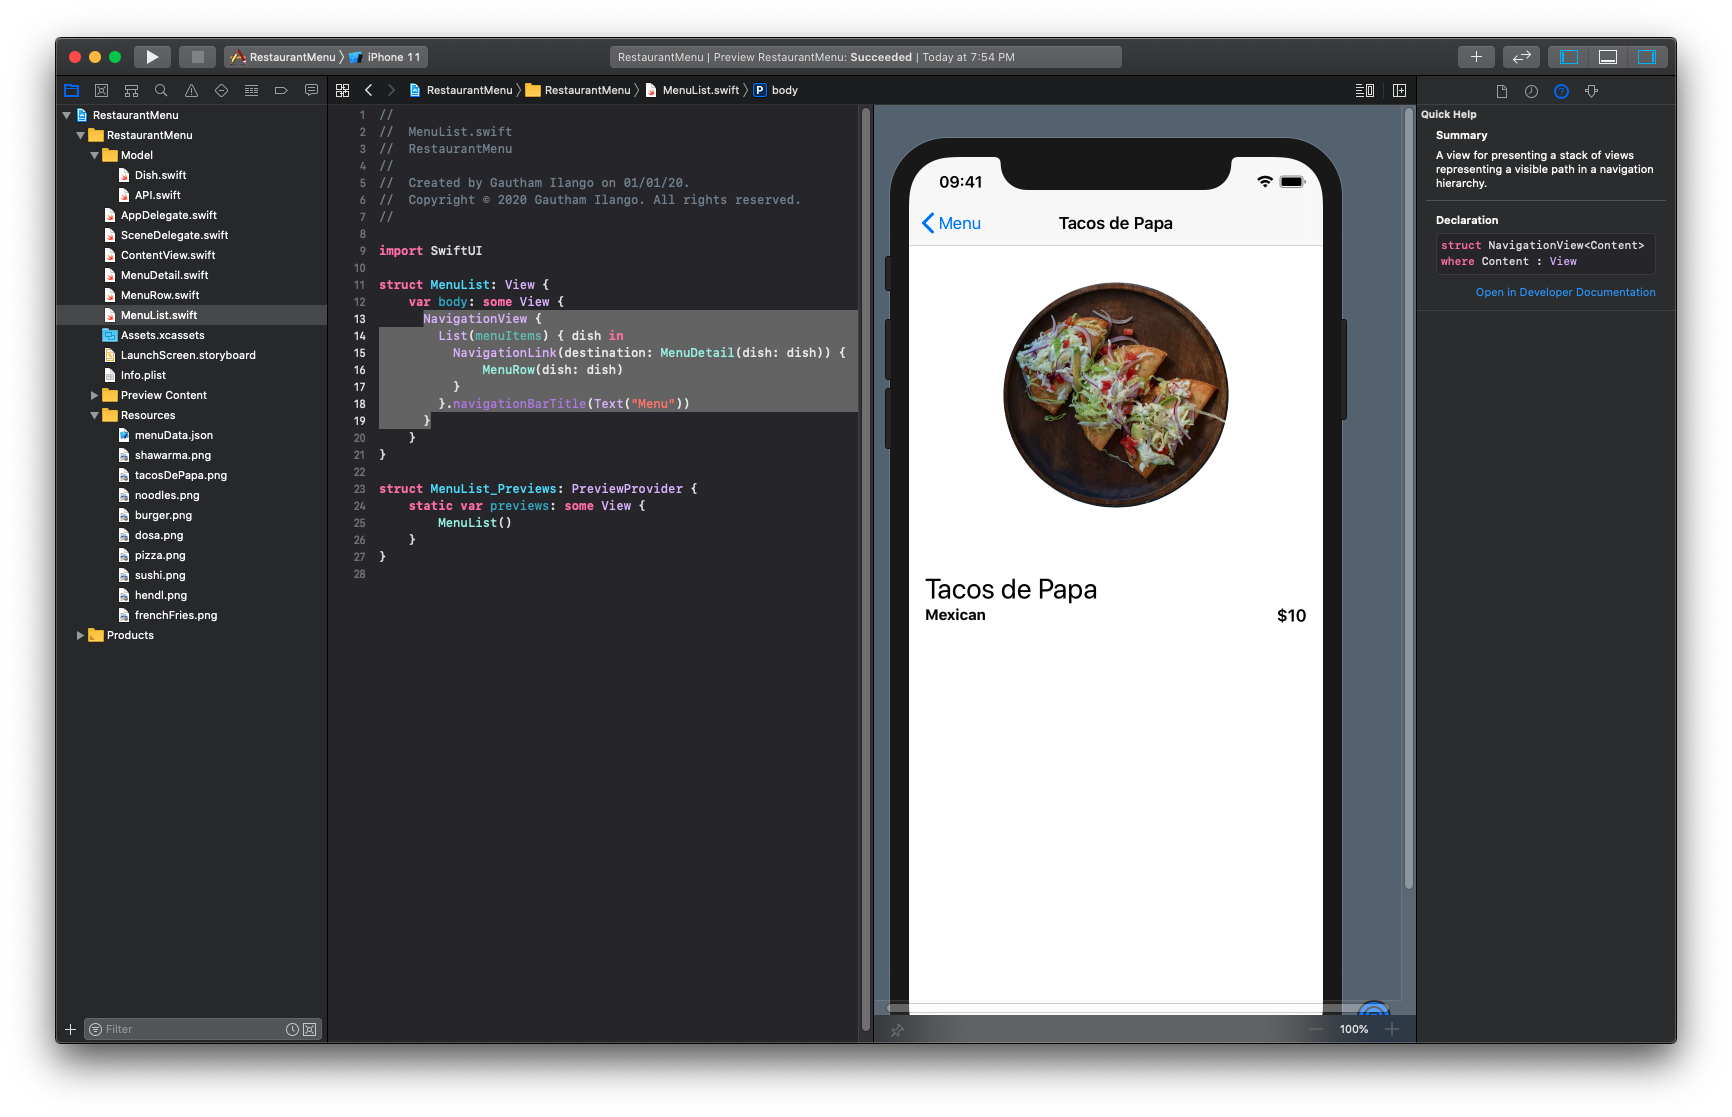
}That’s it. navigationBarTitle modifier sets the title Text of the screens inside NavigationView. Now you can run the preview in the canvas to see NavigationView working. Clicking on a row will take you to the respective Menu Details screen. Here, the NavigationLink works similar to Segue but in SwiftUI and in the most declarative way. This is how it should look.
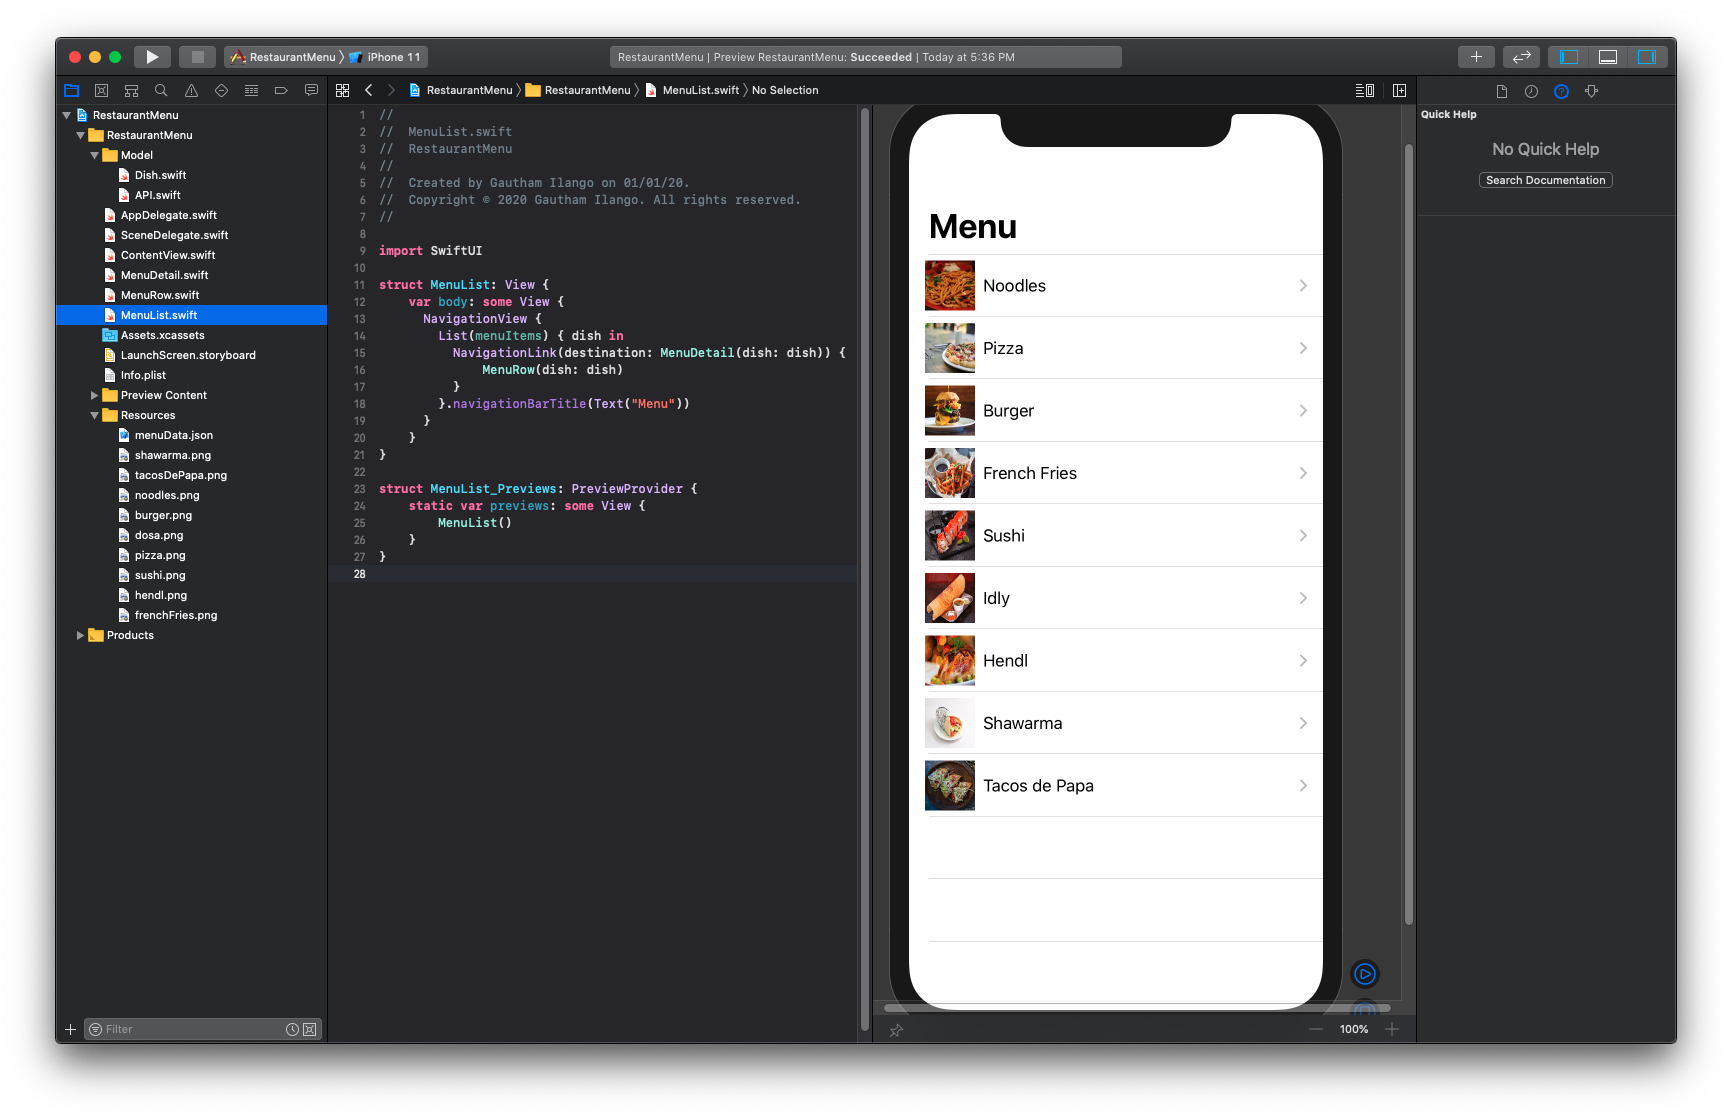 Clicking on a row will take you to menu details screen.
We will dive in deep in the future posts about NavigationView. You can download completed project here and find more info on NavigationView here