How to create UITableView(TableView) in SwiftUI?
If you’re familiar with iOS app development you must have come around UITableView, it’s one of the most important and very basic element in the iOS app development. UITableView is used to display data in a list and it also gives the developer a fair amount of control over how the data is presented and how the user can interact with it. And for people from other realms, it’s like RecyclerView of Android and FlatList of React Native. Even though they are used to solve the same problem(Displaying the data in a list), they are architecturally very different. And let’s see how we are going to display a list of data in SwiftUI.
SwiftUI’s List
List is used to display a list of data in SwiftUI. And implementation of the List is the most declarative way a single row table can be. Unlike UITableView, List can have any View as its basic building element and they are not limited to something like UITableViewCell. To learn more about List, let’s create an App that lists the items in menu of a typical restaurant.
If you’re feeling lazy to create the project, and add & process the JSON file, you can download the initial code from here and jump right to the next section by clicking here.
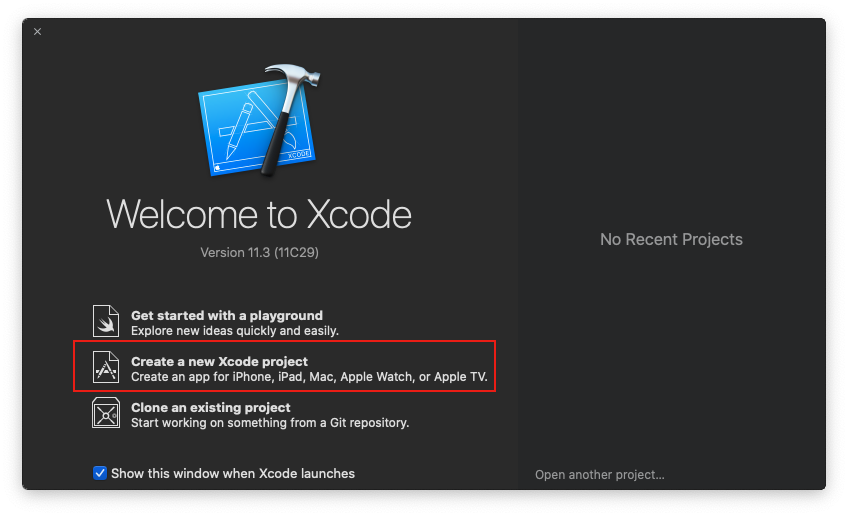
Open Xcode and select Create a new Xcode project.
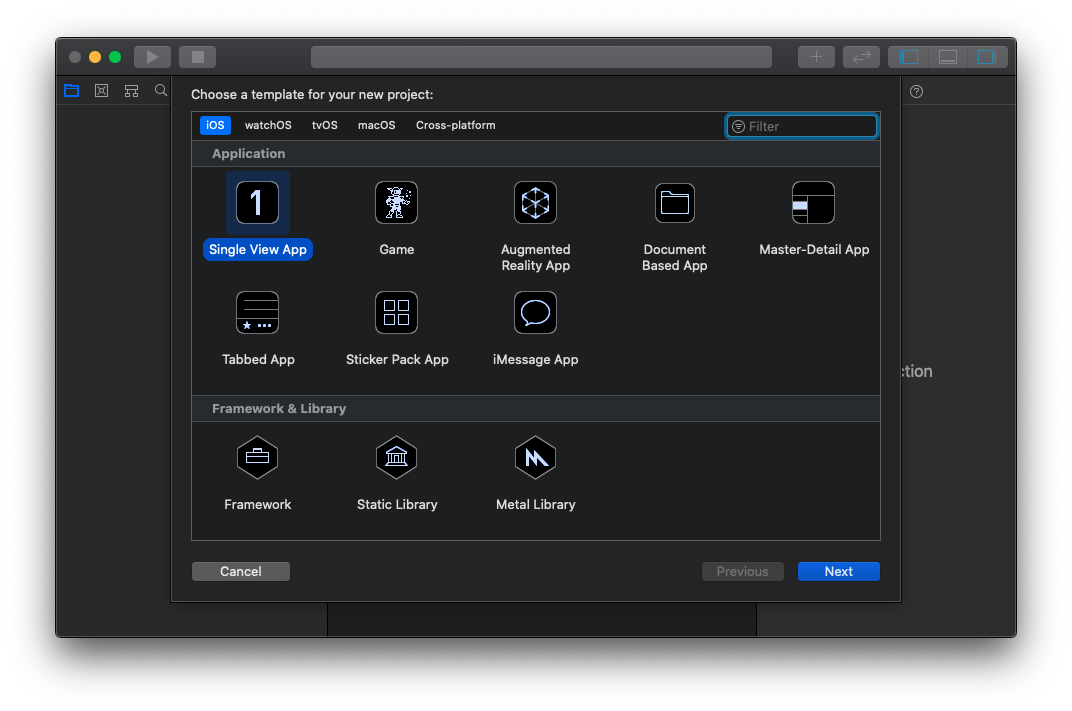
 Then choose the template as Single View App and click Next
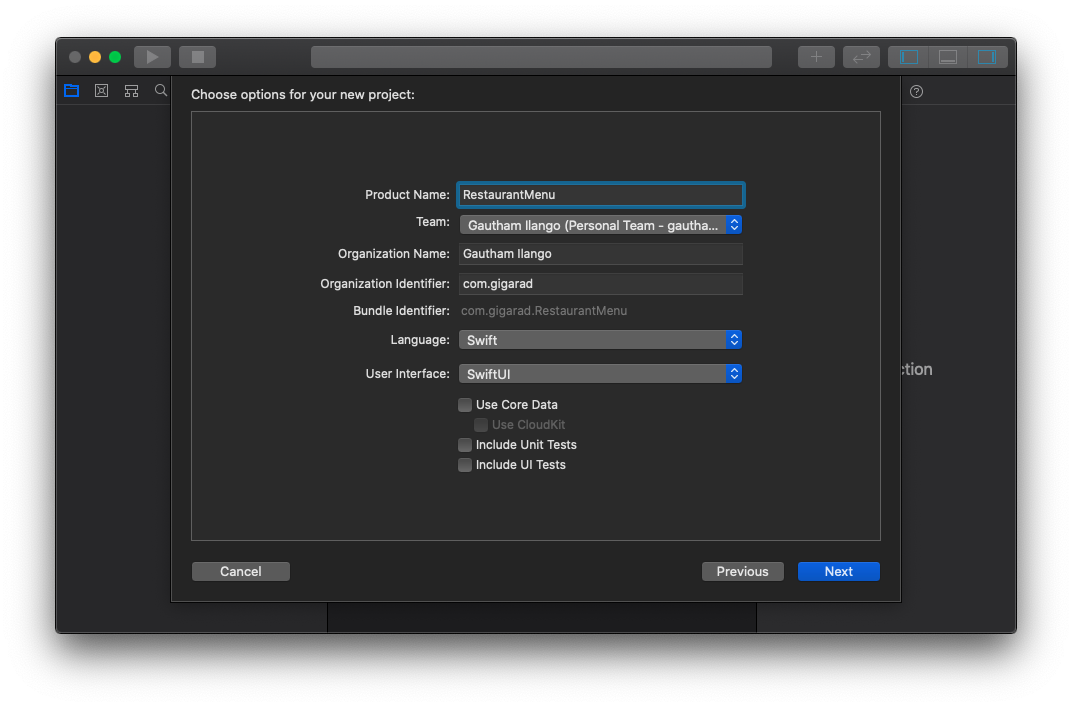
 And then fill in the details for the new project, let’s name the app “RestaurantMenu” and make sure you’ve selected
 SwiftUI for the User Interface. And click Next.
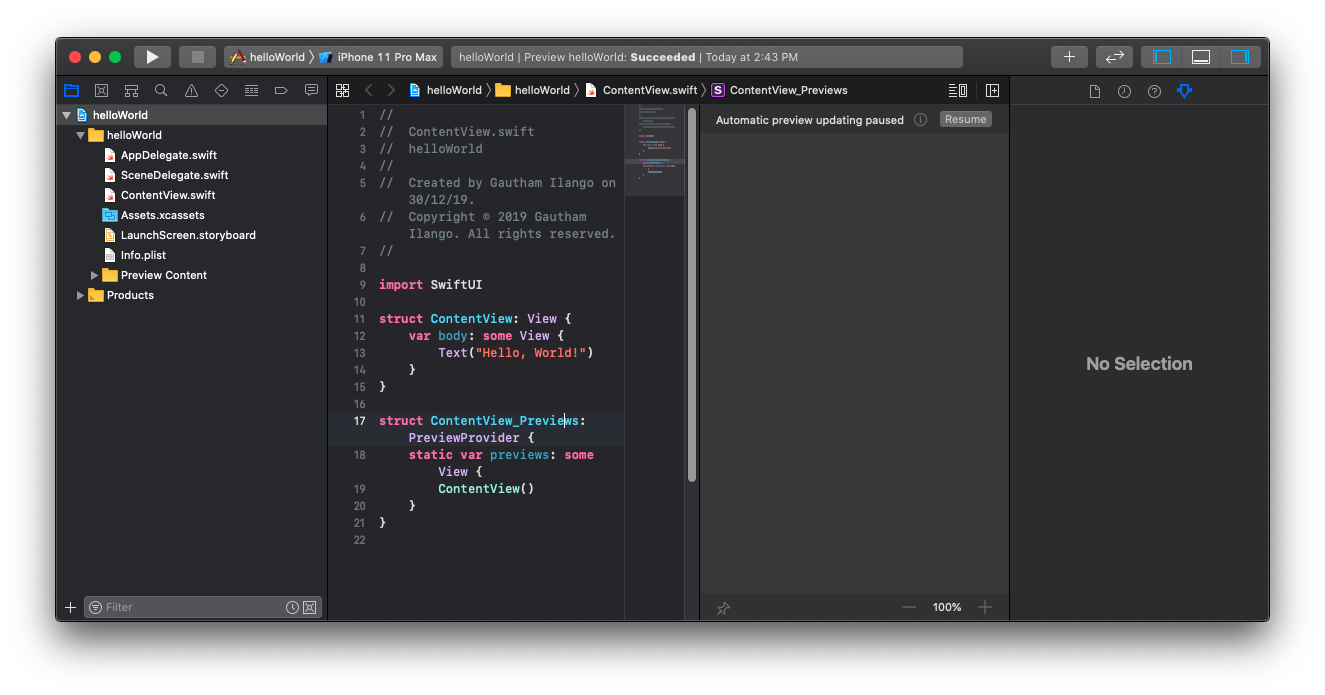
 And then choose your preferred directory and click on Create to create your new Project. Once you’ve created your project you will be presented with a screen like this.
 Now we can start by adding the seed data for the restaurant Menu, which will be a
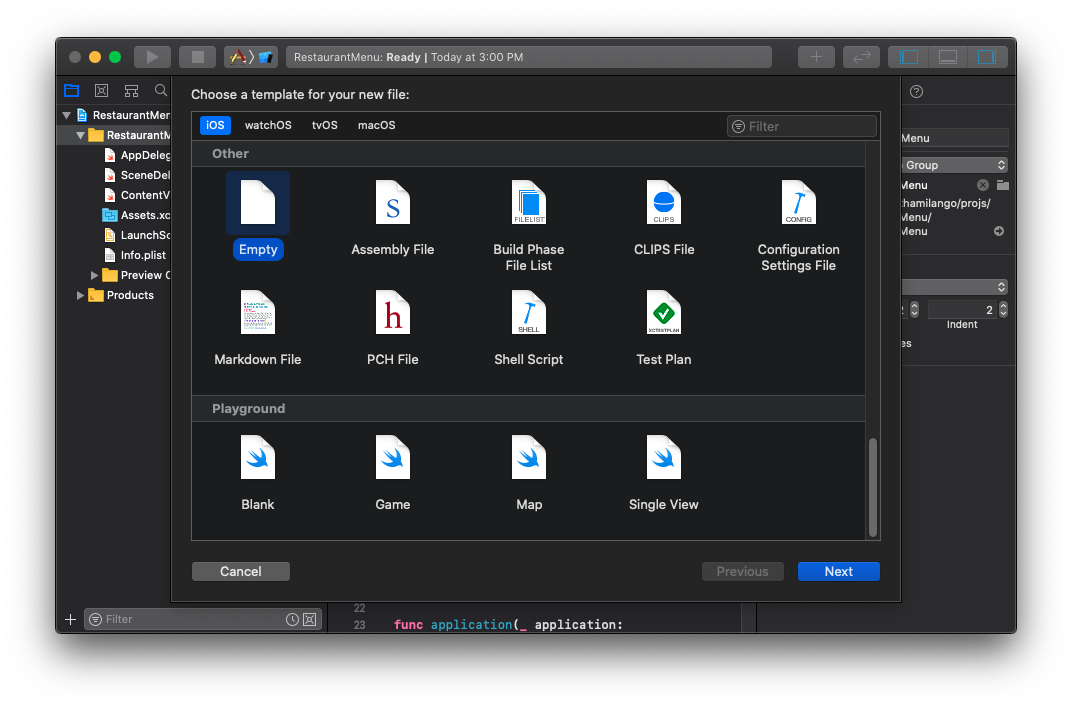
 JSON file and contains details about the dish. Create a new Empty file by using the shortcut key CMD + N and selecting Empty from Other section.
 And then enter the name
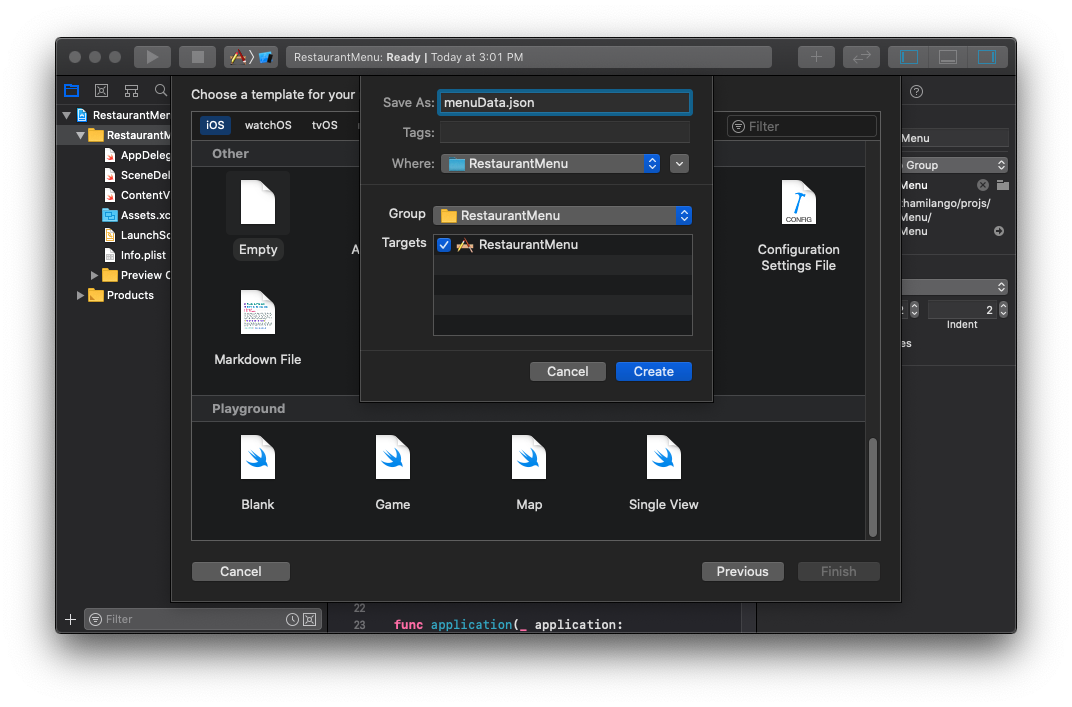
 menuData.json and click on Create to create the file.
 And then enter the contents in the below sample or you can add your own.
[
  {
    "name": "Noodles",
    "cuisine": "Chinese",
    "price": 10,
    "id": 1,
    "imageName": "noodles"
  },
  {
    "name": "Pizza",
    "cuisine": "Italian",
    "price": 5,
    "id": 2,
    "imageName": "pizza"
  },
  {
    "name": "Burger",
    "cuisine": "American",
    "price": 5,
    "id": 3,
    "imageName": "burger"
  },
  {
    "name": "French Fries",
    "cuisine": "American",
    "price": 1,
    "id": 4,
    "imageName": "frenchFries"
  },
  {
    "name": "Sushi",
    "cuisine": "Japanese",
    "price": 5,
    "id": 5,
    "imageName": "sushi"
  },
  {
    "name": "Dosa",
    "cuisine": "Indian",
    "price": 1,
    "id": 6,
    "imageName": "idly"
  },
  {
    "name": "Hendl",
    "cuisine": "German",
    "price": 10,
    "id": 7,
    "imageName": "hendl"
  },
  {
    "name": "Shawarma",
    "cuisine": "Middle Eastern",
    "price": 10,
    "id": 8,
    "imageName": "shawarma"
  },
  {
    "name": "Tacos de Papa",
    "cuisine": "Mexican",
    "price": 10,
    "id": 9,
    "imageName": "tacosDePapa"
  }
]
And add appropriate images. Create a group called Resources and move them all in. And make sure they all added in your Copy Bundle Resources under Build Phases in your project.
Processing the JSON Data
First we need to define the structure of our Dish items to process the JSON. Create a new Swift file and name it as Dish and add the contents from below.
struct Dish: Codable, Hashable, Identifiable {
  var id: Int
  var name: String
  var cuisine: String
  var price: Int
  var imageName: String
}
You can see that the types and names are similar to the data in JSON file. And we are using Codable, so that we don’t have to do any additional work in processing/decoding the JSON file.
Create another file, call it API and add the following contents.
let menuItems: [Dish] = processJSONData(filename: "menuData.json")
private func processJSONData<T: Decodable>(filename: String) -> T {
  let data: Data
  guard let file = Bundle.main.url(forResource: filename, withExtension: nil)
      else {
          fatalError("Couldn't find \(filename) in main bundle.")
  }
  do {
      data = try Data(contentsOf: file)
  } catch {
      fatalError("Couldn't load \(filename) from main bundle:\n\(error)")
  }
  do {
      let decoder = JSONDecoder()
      return try decoder.decode(T.self, from: data)
  } catch {
      fatalError("Couldn't parse \(filename) as \(T.self):\n\(error)")
  }
}
final class RestaurantImageStore {
    typealias GRImageDictionary = [String: CGImage]
    fileprivate var images: GRImageDictionary = [:]
    fileprivate static var scale = 2
    static var shared = RestaurantImageStore()
    func image(name: String) -> Image {
        let index = guaranteeImage(name: name)

        return Image(images.values[index], scale: CGFloat(RestaurantImageStore.scale), label: Text(verbatim: name))
    }
    static func loadPNGImage(name: String) -> CGImage {
        guard
            let url = Bundle.main.url(forResource: name, withExtension: "png"),
            let imageSource = CGImageSourceCreateWithURL(url as NSURL, nil),
            let image = CGImageSourceCreateImageAtIndex(imageSource, 0, nil)
        else {
            fatalError("Couldn't load image \(name).png from main bundle.")
        }
        return image
    }
    fileprivate func guaranteeImage(name: String) -> GRImageDictionary.Index {
        if let index = images.index(forKey: name) { return index }

        images[name] = RestaurantImageStore.loadPNGImage(name: name)
        return images.index(forKey: name)!
    }
}
The above code is pretty simple. loadPNGImage function looks for the file and then gets the data from it. And later decodes it with JSONDecoder.decode. The generic type T has a constraint, it should conform to Decodable. We are assigning the output of the function call in the first statement to menuItems, a constant Array of Dish items. So the type Dish is implicitly taken as the generic type T, you must have noted Dish conforms to Codable and Codable itself conforms to Encodable and Decodable, so the constraint is satisfied. The RestaurantImageStore processes the imageName and provides us an Image element which we can use directly in our SwiftUI View.
Menu Row
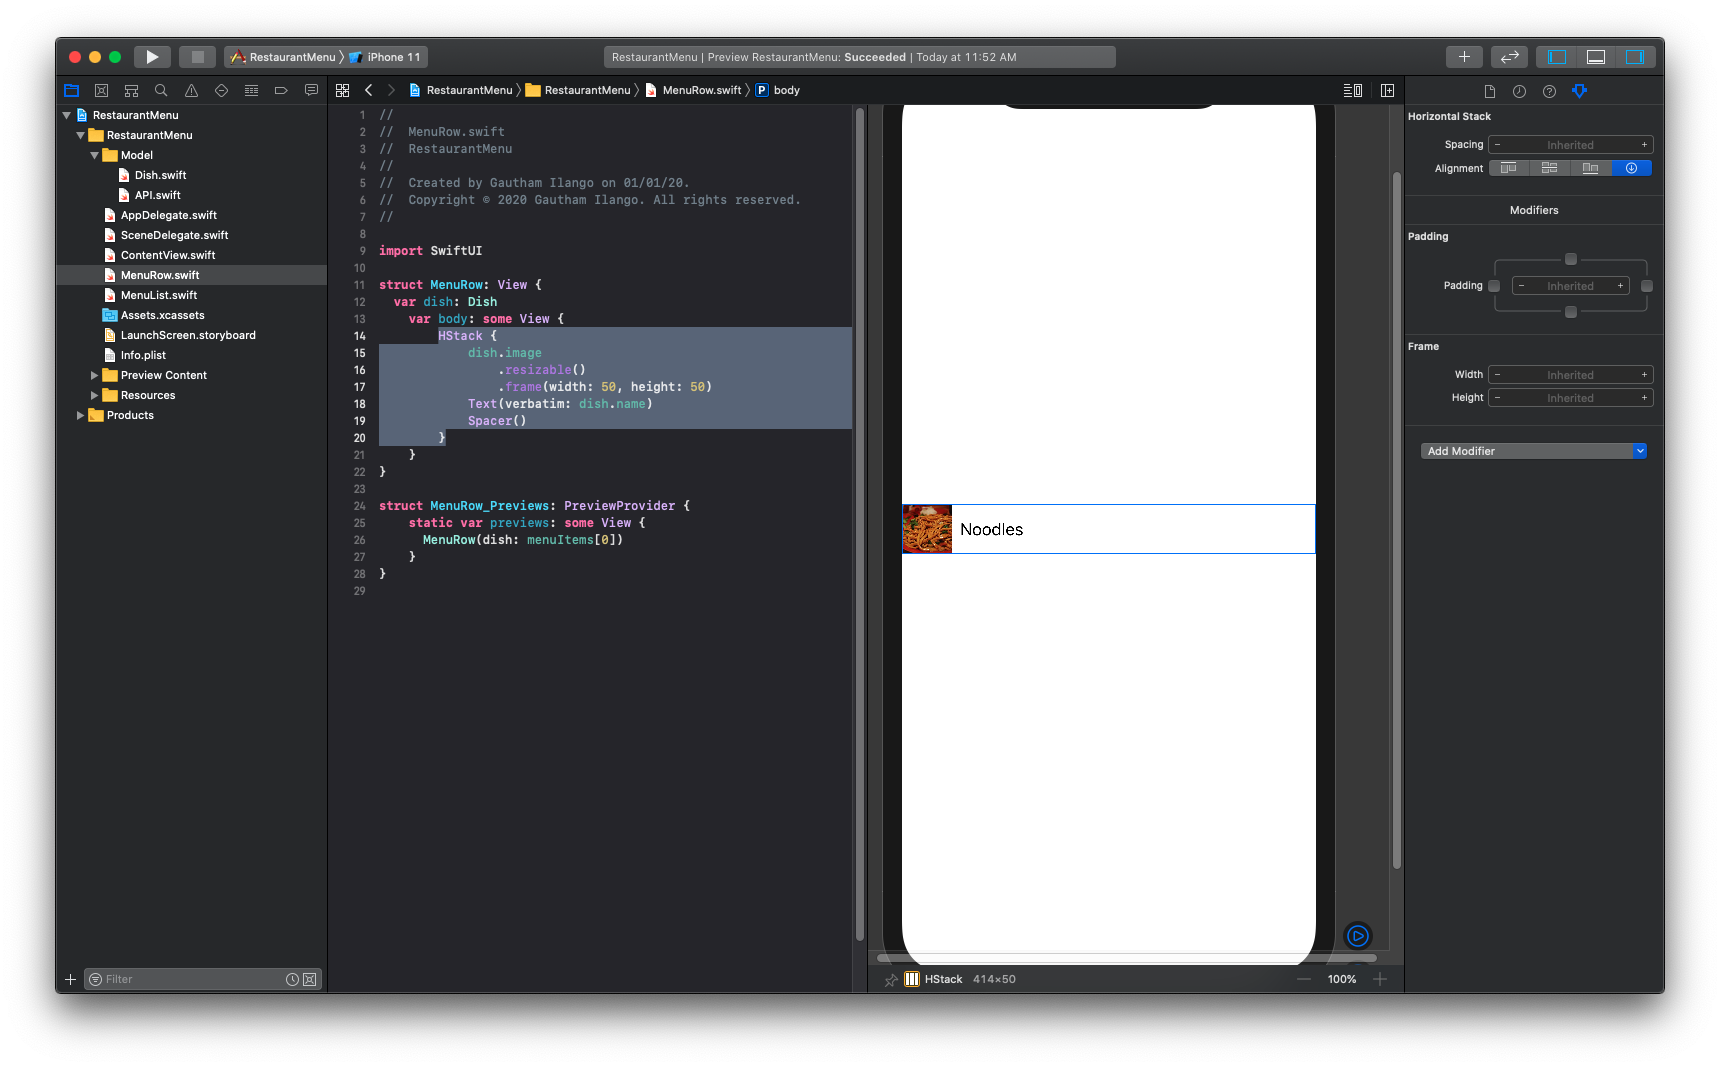
Now let’s create the row element for our Menu List. Use shortcut key CMD + N, select SwiftUI View under User Interface section. And name the file as MenuRow and click Create to create the file. You will be presented with the new file, with the boiler plate code, that displays “Hello,World!”. Click on Resume button in the canvas on the right hand side to see the previews. Let’s replace the code of MenuRow struct with the following.
var dish: Dish
    var body: some View {
        HStack {
            dish.image
                .resizable()
                .frame(width: 50, height: 50)
            Text(verbatim: dish.name)
            Spacer()
        }
    }
We are using a HStack. And it lets us add SwiftUI View elements in a horizontal direction. If you’ve past experience with Swift, you must wonder how this is possible. This kind of syntax is possible due to the new features in Swift 5.1, return omission and FunctionBuilders. And this is how we implement the UITableViewCell like structure in SwiftUI. In the preview it should look something like this.
Menu List
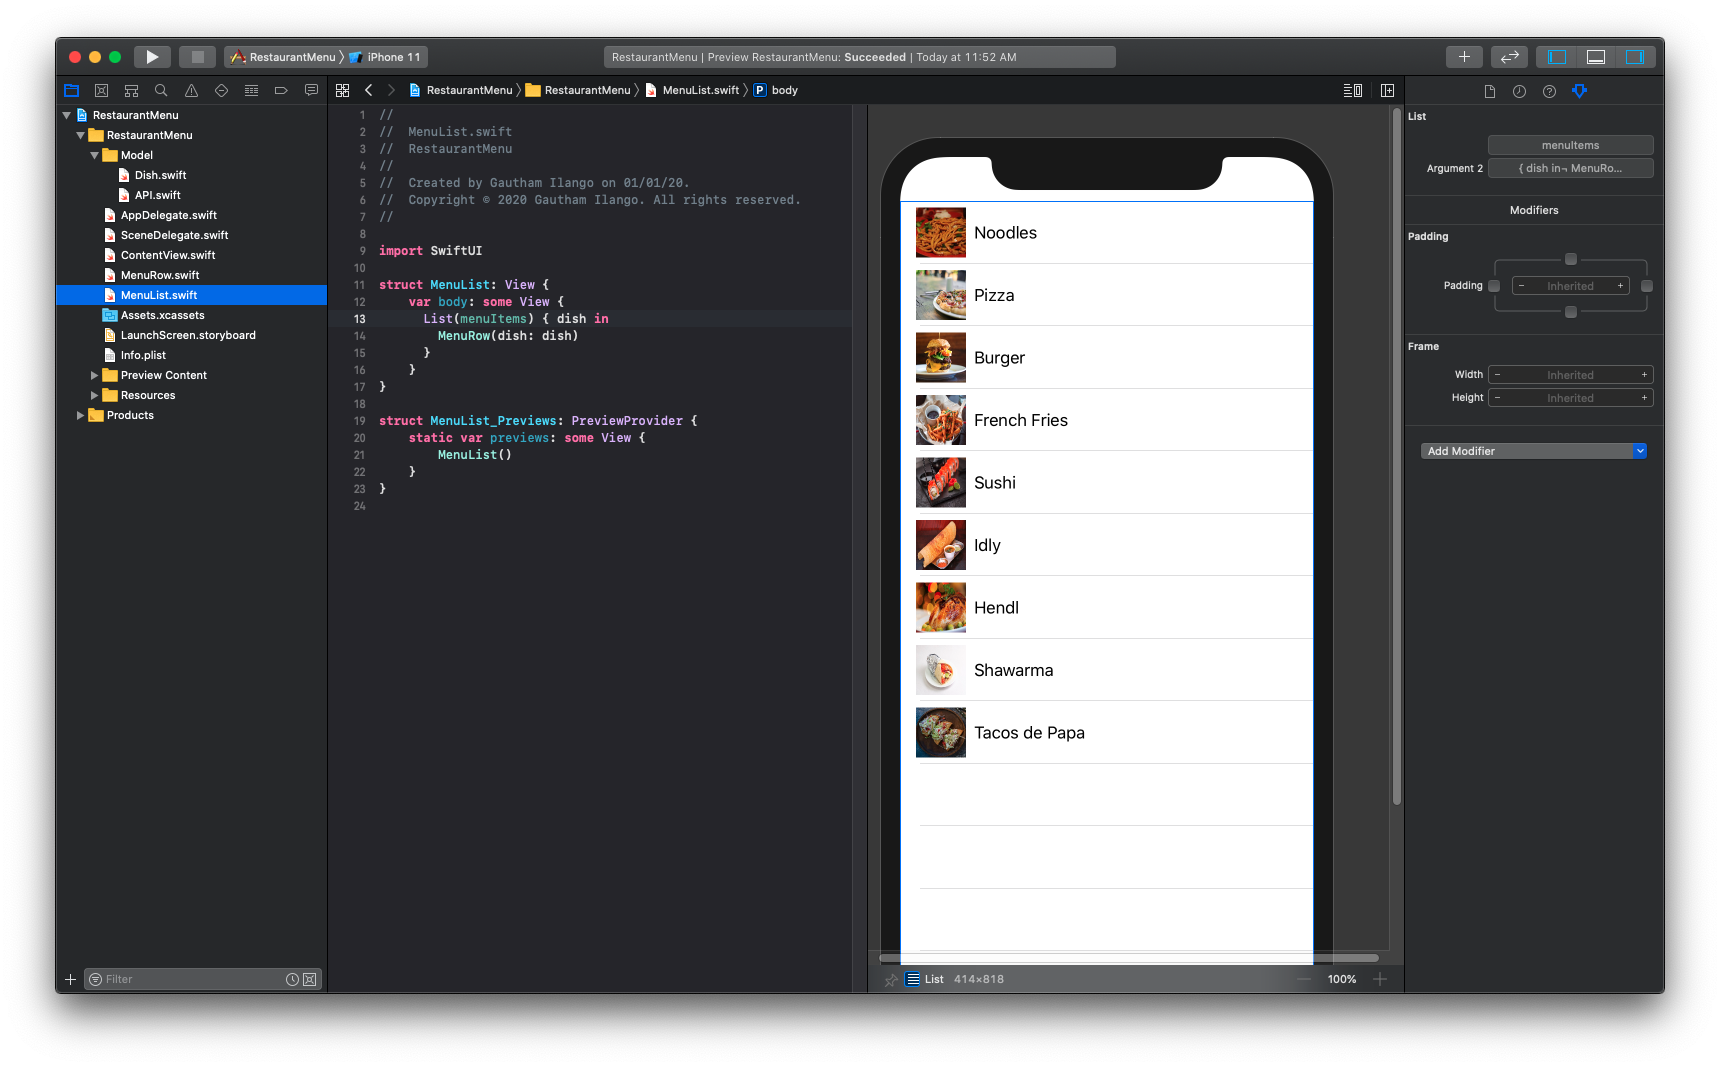
Now let’s create our Menu table or list. Again create a new SwiftUI View by creating a new file and now name it as MenuList. And replace the content of the getter of variable body in the MenuList struct with the following code.
List(menuItems) { dish in
    MenuRow(dish: dish)
}
That’s it. Click on preview to see the List working.
 Pretty simple huh? If you’re from iOS development background, you would be shocked, because the above code is very very minimal and highly declarative and makes complete sense. All thanks to the Opaque types, Function Builders and Return omission features in the Swift 5.1. The
 Dish struct conforming to the Identifiable protocol lets us not declare the unique id key path, which is required to initialize the SwiftUI List. More on ViewBuilder and function builders in the future, they make this kind of code possible. You can download the completed project here. To know more you can look into Apple’s official SwiftUI tutorials by clicking here.